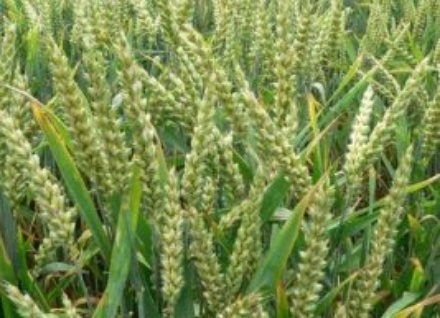
Wheat Farming In Nigeria: Guide on How To Start (2026)
This article serves as guide on how to start wheat farming in Nigeria. Since the market is everywhere, cultivating wheat in the country is a sure business that would yeild profit.

Wheat processing in the country isn’t that familiar. Although, people patronize the products gotten from wheat such as biscuit, spaghetti, bread, cookies and noodles. Not only these, even many local delicacies depend on this cereal. Most notable is the wheat flour.
Others includes fura (drank alongside nunu), dan wake (Hausa local food), etc. The high demand on wheat means there’s a market for wheat production and as far as the production of wheat in Nigeria is concern, it is pretty much low compared to it demand.
So, you can start a wheat farm in Nigeria and make a fortune from it. This article will describe the steps required to start a wheat farm business in Nigeria.
Step 1: Write out your buisiness plan
Writing a wheat farming business plan should be the first thing you would need to do. This should help you phathom the direction where you want your business to go to.
Step 2: Site and Seed Selection
The second step to cultivating wheat in Nigeria is deciding on the location and variety of wheat to plant. First of all, know this; wheats don’t grow everywhere.
They have their own needs and that is why they are mostly grown in the northern part of the country. States that support farming of wheats includes Bauchi, Adamawa, Sokoto, Kano, Borno, Jigawa, Zamfara, Kebbi, Gombe, Yobe and Kaduna.
One of the requirements for wheat production is the cultivation is rainfall. The range of rainfall that support wheat production is 500 – 1200mm. however, when it gets below these, irrigation is requirement to substitute rainfall.
Another requirement of wheat is a well-drained soil that is low in acid and saline content.
Step 3: Select wheat type
After choosing where to locate your farm, the next step is to choose the variety of wheat to plant and that will depend on what you want to use the weed for or what your intended market will use the wheat for so you need to read on the variety of wheats and their specific requirement and what they are best used for.
Step 4: Planting and post planting
After your site and seed selection and of course, land clearing, tilling and other preparation activities, the next step is to plant the wheats. They are usually planted during the dry season around March/March.
This is the harmattan period and does not support weed growth so when it is the time weeds will start growing well, the wheats are all grown and can suppress the growth of the weeds.
Wheats can be planted either mechanically or manually. If you are going the manual route, you can plant it by digging trenches using a shovel or a wheat drill and then put in the seed and then cover it. Most people go the manual method using the wheat drill.
After planting, the next step is taking care of your plants to ensure maximum productivity and prevent anything that can decrease productivity. First thing is irrigation. The wheat farm should be watered monthly if the area does not enjoy abundant rainfall.
Aside watering, application of fertilizer is one important activity to boost fertility and productivity. The fertilizer to be used is the NPK fertilizer and should be applied twice.
It should be applied using the 60:50:50 ratio and then after 6 weeks, you use the 60:0:0 ratio. Also, prevent your plants from pests and diseases by watching out for them and visiting the closest agricultural store and seeking for help from a professional.
Step 5: Harvesting
Usually, your wheats should be ready for harvest. However, don’t go harvesting when it is not ready yet. To know if your wheat is ready for harvest or not, rub the head between your fingers and chew the wheat grain. If the wheat cracks in your mouth and becomes soft, it is ready for harvest.
To harvest the wheat, cut the stalk and winnow to remove the chaff. After harvesting, it is time to store your grains. The storage method used for wheat is pneumatic, it is stored in 3 layered bags to deprive any insect larva or egg from survival. However, one thing you need to guard against is rat infestation.